Kram Cardi CAL: Design Reveal and Supply List | KT and the Squid
Disclaimer: This post contains affiliate links.
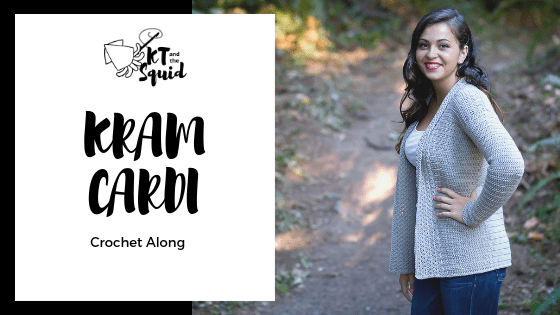
Here we go! This is the official start of the Kram Cardi CAL. My very first crochet-along!
The Kram Cardi was designed with my fans in mind. If you’ve never made a cardigan or sweater or any garment before then this should be perfect! During the CAL you’ll probably learn some new skills but I’ll be here every step to of the way. Skills you’ll need (but can learn as you go) include foundation stitches, single crochet, double crochet, working in the front loop, blocking and seaming. I took as many photos as I could throughout the process to try to be as clear as possible.
The Pattern:
The pattern will be available here on my blog completely FREE. That’s right, there’s no need to purchase the pattern at all. However, I have made an Official Kram Cardi PDF that is available for purchase. This will come in handy if you’d like the pattern in it’s entirety to print free of ads. Please keep in mind you do NOT need to purchase the PDF to participate in this CAL.

The Schedule:
The CAL will be broken up into 5 parts from 8/14/15 to 9/25/15. Honestly, I could whip out a sweater in a few days but I want to make we go at a nice comfortable pace. Here is the schedule (I will add links to each part as they are posted).
Week 0 (this post): Pick a Size and Gather Supplies
Week 1: Gauge and Giveaway Info
Week 6 (9/25/15): Yarn Giveaway Winner is Announced
Let’s get started!
Sizes:
No, there is no actual crocheting this week but you do need to do something very important (besides gather supplies). You need to pick a size! There’s a little more info about picking a size HERE if you’re interested.
Please don’t just pick the size you think you are. A small for one pattern is not the same as a small for another pattern so we need to check some measurements. It’s like trying on clothes at a clothing store to make sure you buy something that fits.
Lets start with the basics, the pattern is written for sizes XS(S, M, L, 1X, 2X, 3X) (I’ll keep this color coding throughout to keep things easy on you all so make note of your color now) and designed to fit a bust of 28”(32”, 36”, 40”, 44”, 48”, 52”). Finished busts are 34”(38”, 42”, 46”, 50”, 54”, 58”). I designed the cardigan to have 6″ of positive ease (so the actual cardigan is 6″ larger than the actual bust) with a 4″ overlap in the front.
Designer Insight: I added a generous 4″ overlap in the front of the cardigan because I wanted it to be like a big hug (Kram is Swedish for hug).
With a t-shirt and the undergarment on of your choice measure you bust at it’s fullest. Get someone to help you if you can. This will give you an general idea of what size you should make.
Now, not everyone will fit exactly into these measurements and that’s OK. Perfect example, my gorgeous model above has a bust of 35″ and is wearing size small. This just means it’s a bit more fitted on her and we both loved how it fit. At the same time, I have a 32″ bust and am wearing the exact same cardigan here below (it’s the same color, just different lighting). It’s so comfy and over-sized. I still love it! My model probably could have gone up a size for a more over-sized/comfy fit and I could have gone down a side for a more fitted sweater.

Need a little more info? OK! Here’s our schematic. Feel free to print this off (click on it to make it larger). It will come in handy when we get to the blocking.

Looks a little funny, huh? Don’t worry it will all make sense as we go. I’ve added a few labels so hopefully, you can understand what will go where. Don’t worry about the colors, they will be used when we get to the seaming.
On your schematic are some important measurements. You’ll use them when you block your finished pieces and you can use them now to help pick a size. Go to your closet (right now!), grab a top/sweater/cardigan, whatever article or clothing that you like the how it fits and a tape measure. Measure these key places on your garment and compare to the schematic. It still might not be perfect but it will give you something to actually look at and see how it might fit on your body.
Do you know what size you’ll be making? Great! Let’s move on to the supplies. Still not sure? That’s OK. I’ve created a Facebook group HERE. Feel free to join and maybe another participant or I can help!
Not happy with some of the lengths? I can help a little. If you need a longer/shorter body or sleeve these are easy things to fix and I’ll give you some advise when we get there. Keep in mind any alterations will affect the amount of yarn you’ll need.
Disclaimer: While I would love to have made a size to fit everyone these are the 7 sizes I have chosen. If you’d like to try too alter the pattern to make it larger or small please feel free to do so but at your own risk. Unfortunately, besides simple length changes I will not be able to advise you on how to do this at this time. Thank you for understanding!
What You’ll Need

YARN!: Cascade 220 Superwash (100% superwash wool; 220 yd/200 m/ 3.5oz/100g; worsted/4 weight) 5(6, 6, 7, 7, 8, 9) balls of Ridge Rock (874) or the color of your choice.
You can purchase yarn from several places. If you have a LYS (local yarn store) they will most likely have it. Craftsy, Amazon, Annie’s, Patternworks, and Paradise Fibers carry it. If you are in the UK HERE
is your Amazon link.
Make sure you purchase 220 Superwash and NOT 220 Superwash Sport. Sport is a thinner yarn and may not work for this pattern.
- Yarn Substitutes:
- If you’re looking for a bit more affordable yarn or maybe just a different color I 100% recommend Cascade 220 (100% Peruvian Highland wool; 220 yd/200 m/ 3.5oz/100g; worsted/4 weight): It matches perfectly for gauge and feels/drapes the same. The only drawback is it’s not superwash so you have to handwash (which is what I do anyways).
- You can purchase Cascade 220 from locally from your LYS. You can also order from Craftsy, Amazon
, Annie’s, Patternworks, or Paradise Fibers. Again, HERE
is the link to Amazon for those of you in the UK.
- You can purchase Cascade 220 from locally from your LYS. You can also order from Craftsy, Amazon
- Allergic to wool? Or maybe you’d just like another fiber? Here are some yarns from Cascade that may be a good substitute. I was able to match gauge for all of these yarns but be prepared to spend a bit more time and use more yarn checking your gauge. You should be able to get most of these from your LYS, Craftsy, Paradise Fibers, Amazon
- Cascade Cherub Aran (55% nylon, 45% acrylic; 240 yd/220 m/ 3.5oz/100g; worsted/4 weight): I felt this was the best substitute it feels very similar and it’s usually a great price.
- Cascade Sateen Worsted (100% acrylic; 225 yd/206 m/ 3.5oz/100g; worsted/4 weight): This yarn was a bit splitty but I really liked how it worked up. The fabric was a bit more dense (not too bad) but still really soft and nice against the skin.
- Cascade Ulra Pima (100% pima cotton; 220 yd/200 m/ 3.5oz/100g; light/3 weight): LOVE this yarn! It’s so soft and not too heavy for a cotton. The fabric draped a lot more than the superwash but it would make a wonderful cardigan.
- Cascade North Shore (100% acrylic; 220 yd/200 m/ 3.5oz/100g; light/3 weight): This was very similar to Ultra Pima but a bit less drape. Perfect if you don’t want the weight of the cotton.
- If you’re looking for a bit more affordable yarn or maybe just a different color I 100% recommend Cascade 220 (100% Peruvian Highland wool; 220 yd/200 m/ 3.5oz/100g; worsted/4 weight): It matches perfectly for gauge and feels/drapes the same. The only drawback is it’s not superwash so you have to handwash (which is what I do anyways).
Disclaimer: Feel free to make a yarn substitute at your own risk. Please note the yardage of Cascade 220 if your substitute has more or less yarn per ball you’ll have to purchase the correct amount accordingly.
Hook: H/5mm (or hook to obtain gauge)
- Gauge will be extremely important for this project. You may not have the same tension as I do and that’s perfectly fine. Be prepared to go up or down a hook size if needed. I’ll talk more bout this next week.
Scissors
Yarn Needle
Blocking Supplies: If you have never blocked in item in your life don’t worry! I’ll help you out. We will start by blocking our gauge swatch so you will want to get these items by next week (some things you can improvise).
- Pins
- I also used Knitter’s Pride Knit Blocker
- Your pins should be stainless steel/rust proof. T-pins will work well and you can get them in any craft store (I’ve even seen them at Walmart). You’ll need quite a few.
- A space to block
- For my gauge swatch I’ll use a small Boye Crochet Dude Blocking Board .
- For the finished cardigan pieces I’ll use larger foam boards (like THESE). They are usually used for gym floors and they work perfectly because you can connect them to fit he size/shape of your pieces your blocking.
- You could also use a spare bed or even just some clean carpet space and some towels. Any surface you can pin into should work just fine.
- Soap
- Bowl/Basin/Sink to wash the pieces in.
- Tape Measure
Pins for sewing seams
- I really like Knit Klips (the mini Knit Klips are good too) but something like safety pins work just as well.
Optional: A button or snap to close the cardigan. I didn’t use one on my cardigan.
Be sure to add the Kram Cardi CAL to your Ravlery queue by clicking HERE.


You May Also Like

My Garden Cardi Free Crochet Pattern

Leudinghause Crochet-Along: Design Reveal and Supply List | KT and the Squid

